Showing posts with label receive. Show all posts
Receive Clickbank Payment Using Payoneer MasterCard
If you have been reading my blog you’ll know that I’ve joined the affiliate marketing world for some weeks now. Seriously, I am so loving my affiliate journey so far because I feel like I have made some little advancement in my blogging carrier that I am happy about
 . I am from Africa and on this side of the world, we are restricted to so many online opportunities. Yes we are indeed restricted from using PayPal, registering with clickbank and so many other great networks online. But that doesn’t stop us from using the mentioned networks.
  |
 I know it’s bad but I have a simple reason for doing that; the simple reason is because I heard and learned that clickbank platform is way easier compare to the rest affiliate platforms around or is there any other simpler affiliate platform out there?
 Some good questions you’d want to know: What if I use some one else’s address to register with clickbank, how will I receive my payment when my payment reached my payment threshold? Simple, instead of collecting check, you will simply integrate your payoneer MasterCard with your clickbank account and withdraw your payment from any ATM machine in your area; now tell me how cool is that?
Even if you’re in a country that is not restricted, it would be good to get your money with ease and without stress right? Aside from using payoneer MasterCard to withdraw money from your clickbank account, you can also use it to withdraw money from your PayPal account, infolinks account, Google adsense account, and so many other platforms… but on our today’s post, we shall be focusing on the topic matter. Hey! Let me not talk too much, let’s just push to the tutorial
How I Integrate My Payoneer MasterCard With Clickbank Payment Service
I feel that this process will be helpful to everyone. But who is this post actually referring to? People that can’t receive check directly from clickbank, people that can’t wait for more than two weeks for their check to reach their door, those who have problem with their PayPal account and those whose areas are not accepted by clickbank…
- To get started, first you will need to get a Payoneer MasterCard. Let’s assume that you already have the payoneer MasterCard and your US Payment Service.
- Now Log in to your ClickBank account but if you don’t have an account yet, you can easily create one at their official website.
- Now it’s time to set up your ClickBank account to distribute funds to your Payoneer MasterCard via xACH using the following steps:
1. Go to the Account Settings tab.
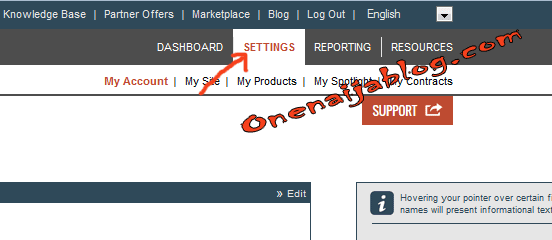
2. Locate your Payment Information near the bottom of the page and click “Edit”.
3. While in the Payment Information Editor, select “Direct Deposit” to reveal the Direct Deposit Information entry screen.
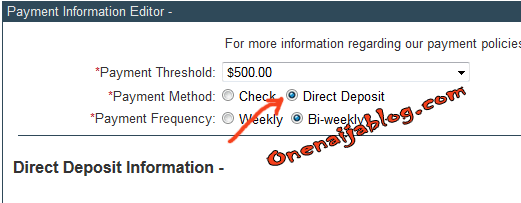
4. Select “United States” as your Bank Country.
5. Enter “First Century Bank” as your Bank Name.
6. For the “Account Number” and “Routing Number” use the US Payment Service information provided to you by Payoneer.
7. Select “Checking” as your Account Type.
8. Finally, click Save Changes. See image below
.png) |
9. After completing the whole process, wait for a confirmation email message from ClickBank notifying you of your changes.
Now that you have successfully completed the simple steps, you can easily receive your payment through your payoneer MasterCard without stress or hassle.
We all know that most countries don’t have a straight addresses and there are some countries that are restricted to participate in most online programs, This post will definitely help, so here it is guys
Back To You Guys
Okay guys, I’d like to hear from you and what you think!!! Do you use payoneer MasterCard for your affiliate, PayPal, Google adsense, Infolinks and any other online trasactions? You can use the comment box below to drop your comments.
Do you have any questions, thoughts or comments you’d love to share with us? Then please do by using the comment box below. Remember that your comments, thoughts and questions are highly welcomed and appreciated.
How was the post? Did you enjoy it? Then please, do click the like button, share us and recommend us to friends because you will never know who among your friends might be in need of information like this. And do not forget to subscribe to our feed for your latest updates on the go…
How To Send / Receive SMS In Chrome Without A Phone [Android]
Ever gone to work or class but forgot to bring your phone along? What options would you have then? Well, you can borrow a colleague or a classmate’s phone for emergency texts or calls, but there is no way to receive the messages that are sent to our phone. If you have access to a computer then you can use your other online social networks to communicate with friends but what about those who are not comfortable using this method
 |
How about using your Chrome browser to manage your SMSes without even using your phone? Well, we’ve found out that you can do that with MightyText, aptly known as Texty. MightyText is an Android application that will synchronize your SMSes with a Chrome browser via an extension. This allows you to use Chrome to send and receive your SMSes during emergencies like this.
Send And Receive SMS Via Chrome
To prepare for this, download MightyText Android App on your phone from Google Play.
 |
When the installation is complete, open the app and complete setup by connecting MightyText with your Google account.
Then install MightyText Chrome Extension on your browser.
 |
Once installation is done, you will be prompted with a notification telling you that you can start sending and receiving SMS from your Chrome Browser. An icon has now been added to your browser. Click the MightyText icon.
After clicking MightyText icon, you will be prompted with your account status: you are not logged in to your Google account. Click on the link to sign in using your Google account.
 |
It will redirect you to a new page to allow the access. Click ‘Allow’.
 |
Once the access is granted, you will see a popup at the top right corner of your computer screen notifying you about how many messages have been received since you installed the Android app. Now every time when you received SMS, you will see this popup.
 |
That said, you can now start sending and receiving SMS from your computer right in your Chrome browser. Anytime you need to use the application, open your Chrome browser and click on the MightyText icon to view the MightyText SMS page.
 |
At the top bar, there’s a notice to sync your contacts. Click to sync MightyText with your Google contacts so that the mobile numbers will appear as your friend’s names instead of their numbers. To compose new messages, simply click the ‘Compose New’ button.
Conclusion
You will be able to use MightyText with your Chrome browser as long as you are connected to the Internet. Note that even if you are sending SMS from your browser, you will still be charged with the standard SMS fee. This is just one of the many ways Chrome is making your life a whole lot easier.
