Showing posts with label IOS. Show all posts
Blackberry Messenger BBM Change to Android & iOS
Blackberry has announced that their Blackberry Messenger popularly known as BBM will be launching across multiple platforms like Android and iOS. Now BBM fans using other mobile devices like Android phone and iPhones can now have the BBM feature on their mobile phone, you can now be able to enjoy the awesome BBM services. This is expected to happen this summer.
The BBM app will be made available on Google Play Store and Apple App Store for users of the various mobile platforms to talk with Blackberry users. The BBM app will support all iOS devices running on iOS 6 and higher, as well as Android devices running Android 4.0 Ice Cream Sandwich and higher. Both apps will of course need to pass Google and Apple’s approval process first.

Blackberry Messenger BBM
In the first version of multi-platform BBM, iOS and Android users are expected to be able to experience the following BBM features:
- The immediacy of BBM chats
- Multi-person chats
- Voice note sharing
- BlackBerry Groups, where BBM users are able to set up groups of up to 30 people and share calendar, photos, files and more.
BBM Voice and Video chatting will not be included in the initial rollout, but will be introduced later through the app updates.
What does this mean for Blackberry?
In truth, most Blackberry phone users today are only using Blackberry because of BBM and when it has been made available on other platforms like Android and iOS, there will definitely be a shift in the number of Blackberry phones purchased but a massive increase in the number of people using their BBM services.
Already Blackberry is claiming to have over 60 million active users of the BBM and they share over 10 billion messages each day, the release of this app to other mobile phone platforms will see that figure triple.
What does this mean for Whatsapp and other alternatives?
Whatsapp became popular as the closest alternative to the BBM as a result of their non-support for other platforms, but when this app will be released for Android and iOS platforms, Whatsapp and other BBM alternatives will be hit a hard blow. I won’t be surprised to either see a healthy competition that will bring about massive changes and awesome innovations or the death of the alternatives.
Are you an enthusiast of the BBM on Android and iOS? What are your expectations? What is your view of this article? Do you think Blackberry is putting themselves at risk by supporting their biggest competitor’s platforms? Or do you think it’s a smart move? Let’s hear from you, use the comment form below to share what you think about this article with me. Remember to subscribe to my RSS feed.
Smart Hidden iOS 7 Features

Our first impression of iOS 7 may have left you loving (or hating) the new features included in the latest operating system for iPhones and iPads. But only after spending some time with it do you begin to appreciate the fun, secret features as well.
Or at least we did. Here are the best hidden features of iOS 7 that we found. We think they'll make you wonder aloud, "I didn't know my iPhone could do that?!"
1. Make Your iPhone Vibrate However You Want
Just like custom ring tones, you can now create custom vibrations for individual contacts with a few taps on the screen. Just go to "Settings" and then "Sounds." From there, hit "Ringtone," where you'll see "Vibration." Under "Vibration," scroll down to "Custom" and hit "Create New Vibration." To make a new vibration, you just tap the screen in the pattern you like.

2. Undo Email Delete With A Shake
Few things are more frustrating than accidentally deleting an important email. But iOS 7 gives you a simple way to undo it in the default Mail app. Just shake your iPhone to bring up the option of undoing an email deletion.
3. Control Your Device By Moving Your Head
You can now control your iPad or iPhone with your head. Not your brain (yet), but your head. iOS 7 can use your front-facing camera to detect head movements. This feature is likely meant for those with limited mobility in their hands, but it's impressive nonetheless.
.jpg)
Go to "Settings," then "General" and then "Accessibility." From there, find "Switch Control" and turn it on. There you can add different "Switches," or physical cues to control your phone.
.jpg)
For example, under "Switches," you can make your phone select something when you tilt your head to the right. A blue square will scroll over each line of apps on your home screen, and one row will be selected when you tilt your head. Then it will scroll through each individual apps, and you can select again.
4. Use Your Flashlight For Alerts
For those of us who have a hard time responding to alarms, this new feature could be crucial. You can make your flashlight flash on and off when you get an alert by going to "Settings," then "General" and then "Accessibility." From there, scroll down and turn on "LED Flash for Alerts." Now when an alarm goes off, your flashlight will flash.
5. Never Miss A Link Your Friends' Tweeted Out
Safari now syncs up with your Twitter feed to show you all the tweets in your stream with links in them. When you're in Safari, go to the bottom of the window and hit the Bookmarks button (the one that looks like a book). Then press the "@" symbol to see all of your Twitter feed's recent links.
.jpg)
Make Your IOS Devices More Kid-Friendly And Child-Safe
Kids born into the tablet generation are exposed to more gadgets, devices and Internet tools than any other generation before theirs. Toddlers can navigate their way in a mobile device like a duck takes to water but they have little to no way of knowing how to be responsible with what they do to the contents of tablets and smartphones.

Here are 5 tricks you can turn your iOS devices kid-friendly (applicable for iOS 6 and above).
1. Block In-App Purchases
If you have a lot of games on your iOS devices (who doesn’t?) you will need this. With your credit card linked to your Apple ID, you really don’t want to make a purchase as easy as tapping a button, especially when the person tapping it does not understand what a ‘purchase’ means.
To block in-app purchases:
- Tap on Settings > General > Restrictions.
- If this is your first time using restrictions feature, tap on Enable Restrictions.
- You will be asked to set a 4-digit passcode. Enter the passcode twice for confirmation.
- Scroll down until you see the ‘Allowed Content’ section.
- Under ‘In-App Purchases’ toggle it OFF.

Future purchases will require the use of the passcode you have just set to proceed.
2. Disable ITunes, Installing & Deleting Apps
If you are afraid that your kids might accidentally delete off some of your apps or download paid apps without you knowing, you can avoid that disabling this feature under iTunes.
To disable app installation and/or deletion:
- Go to Settings > General > Restrictions.
- Under Allow, turn OFF iTunes.
- Turn OFF Installing Apps and/or Deleting Apps.
When you turn all 3 features, the icon for iTunes and App Store will disappear from your home screen, thus making the feature inaccessible.

3. Disable Safari And Protect Data
To make your device more kid-friendly, you can disable more features under the Restrictionsoption. You can toggle OFF Safari, so that your kid can’t visit any website via the browser while they are on the device.
To protect data inside your Mail, Contacts and Calendars, under the ‘Accounts’ section, set your accounts settings to ‘Don’t Allow Changes‘.

4. Set Up YouTube Account
YouTube has a lot of great content for kids and is a favorite place for kids to find animation, music, videos and the likes online. It is best to set up an account for your child. From there, you can make a video playlist of content you think are suitable for their consumption. This will also protect your own playlist from being unintentionally tampered with.

As an added step, before handing the device to the kids to watch, enable Guided Access, so you can disable other parts of the screen to make sure they can’t leave the YouTube app, and wander elsewhere unsupervised.

5. Create ITunes Account
Not only can you give them a YouTube account, you can also create an iTunes account in their name. Then, you can either set an allowance for their app purchases, or gift them the app. With this you can control and monitor what they spend on in iTunes

For children who are more mature with their activities online, this is also a good way to allow them to manage their own set of apps, without a credit card linked to the account. Note that if you are sharing a device with your kid, you will need to swap between accounts.
Summary
The tricks listed above are not foolproof especially against tech savvy kids who will undoubtedly one day outdo you when it comes to handling gadgets and mobile devices. So if the abovementioned methods do not work, you can always fall back on getting them to seek for your permission before they do anything on your devices.
Do note however that keeping your gadgets in working order is not as important as regularlychecking in on your child‘s activities online. Keeping an open communication style allows them to speak to an adult if they have questions, or whenever that need arises.
What about you? What are your methods in handling gadgets around users of much younger ages?
Clean Your IOS Devices For Extra Space With PhoneClean
Running out of space in your iOS device? Try deleting some of the unused apps. But then we might need it later on, so that may not work for everyone. Hey, what about recovering some storage capacity by removing the space-hogging files? And you can do that easily with PhoneClean.
 |
iMobie PhoneClean is a desktop tool which cleans up your iOS device to release some extra space back for use. It deletes files such as temporary files, cookies, script files, media files that failed to sync properly, and cached and offline files. PhoneClean is available for both Windows and Mac.
Clean IPhone, IPad, IPod Touch
PhoneClean is available for download here. Before starting to clean your iOS devices with PhoneClean, it is advisable for you to do an iTunes backup first. In case something goes wrong, you still have your iTunes backup to restore it to your device.
By connecting your device with PhoneClean it will show you the details of your device. PhoneClean allows you to choose which type of files that you want to scan (and subsequently delete) from the iOS device. There are four types of file:
- Temp and Junk files
- Cache and Off-line files
- Cookie and Script files
- Sync-failed Media files
As you can see for this review, our sample device has 19.19GB free space and 10.34GB used space. Let’s see how much free space we can recover after scanning.
 |
Scanning can take up to a few minutes depending on your device capacity.
 |
By clicking on the ‘arrow’ icon under Detail, a list of apps will be shown, along with the number of files it has and the sizes. Uncheck the apps that you do not want deleted. Go back and click onClean up when you are done.
 |
After it finishes cleaning it will display the amount of space that has been recovered.
 |
Conclusion
iMobie PhoneClean is a straight forward desktop tool that helps you to clear data and recover space just like how they described it on the website. After the clean-up, we discovered that all of our apps are like how it is before the clean-up and our accounts are all still logged in i.e. in perfect condition after the clean-up.
Unzip, Read And Edit Files On IOS Devices With FileApp
When receiving zipped files on your iOS device, users who jailbreak their devices will use iFile to open the files within. Not only can it unzip files, but you can view files on iFile too. But, if you are one of the few who didn’t jailbreak your device and want an app that does what iFile does, check out FileApp.
 |
FileApp is a file management app for iOS devices. It simply allows you to unzip, read and edit files and folders on your iOS devices without you needing to jailbreak your device.
Unzip, Read And Edit Files With FileApp
FileApp is available for download here.
Unzip ZIP File
When you have downloaded a ZIP file on Safari or Mail, choose to open the downloaded file with FileApp. Just tap on the ZIP files to unzip it. A new folder which contains all the files from the ZIP file earlier will be created.
 |
Read & Edit Files
With FileApp you don’t have to use another app to read the files as FileApp supports:
- Images – JPG, JPEG, GIF, PNG, ICO, TIFF, TIF, BMP, BMPF, CUR, XBMPDF – PD
- Office –DOC, DOCX, XLS, XLSX, PPT, PPTX, PPS
- iWork – Pages, Numbers, Keys
- Open Document – ODT, ODF, ODP
- Plain Text and RTF – TXT, RTF, LOG, TEXT, M, C, CPP, MM, H
- Audio – MP3, AAC, M4A, AIF, AIFFF, WAV
- Video – MOV, MPEG, M4V, MP4
- Web archives – WEBARCHIVE
- Comic Book Archives – CBZ HTML – HTML, HTM
 |
FileApp can be used to edit files such as PDF, Text and HTML too.
For image editing, you need to upgrade to FileApp Pro to be able to use, edit then save the edited images. The image editor comes with features such as cropping, adjusting brightness and contrast, filters and much more.
 |
You can’t edit Office documents on FileApp, but it allows you to open the document in another app which can edit Office documents e.g. DocsToGo.
 |
FileApp can read image files up to 20MB in size, and has no size limitations for audio and video. As for documents, it depends on your iOS device’s current free memory.
Extra Features
FileApp can also be used to compress folders into ZIP files as well as upload files directly to cloud storages such as Dropbox, Google Drive and SkyDrive.
 |
Connect FileApp To Desktop
For better file management, you can connect FileApp to a computer in two ways:
1. By using DiskAid
Download the tool and install it to manage the files that are available in FileApp. With this desktop tool, you can drag and drop files from desktop into your iOS device.
 |
2. Via Wi-Fi
This will only work on private local networks. By connecting your iOS device and computer on the same network you can access and manage files on FileApp like how you use DiskAid. For more info on how to connect, find it here.
 |
Conclusion
FileApp is a great free file management tool for non-jailbreak iOS devices. It allows you to create text documents, create ZIP files, read, edit manage files. As mentioned earlier, for the photo editing feature you need to upgrade FileApp to FileApp Pro which costs $6.99.
By upgrading to the paid version you will get plenty more desirable features such as:
- Enchanced security with iOS Data Protection
- PDF to MSOffice, OpenOffice, iWork, HTML and Text converter
- RTF to PDF converter
- Photo editing feature
- Built-in custom sound recorder
Frontback – Snap & Share Photos With Front And Back Cameras [IOS]
Don’t like always being left out of a group photo? Well many smartphones have a front camera and a back camera. In the Samsung Galaxy S4 you can take photos simultaneously with the back and front camera in the same photo. We’ve found an app that lets you something similar to that with your iPhone.
 |
Frontback lets you take photos separately with your iPhone’s front and back cameras, then it combines the two pictures into one cool grouped image. Frontback is supported on all iOS devices. Here are Frontback’s cool features.
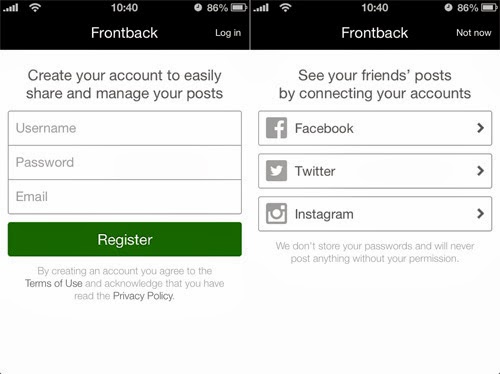
Getting Started With Frontback
After downloading the app, you have to register for a Frontback account to start using it. After registering, you’ll get the option to connect your Facebook, Twitter and Instagram accounts.
At the writing of this article, a Frontback account doesn’t give you features like searching or following other users but we may see that in the future.
 |
Snapping A Frontback Picture
Frontback photos are taken on the back camera first. Hit the camera icon in the middle of the view to snap your first picture, hold your position and tap the camera icon again when the app switches to the front camera.
The top half is your snap from the back camera, while the bottom half is from the front. The front and back cameras won’t be taken simultaneously. If you’re unsatisfied with either of the pictures, tap on it to retake the photo.
 |
Once you’re done, you’ll be ready to share it with your friends on Facebook and Twitter, or save it to your camera roll. Give it a fun caption before you share it out (no help from Frontback there, you’re on your own).
 |
As for sharing on Instagram, you’ll be redirected to the app on your phone for you to repost it there.
 |
Frontback also has a feed where you can see, like and share pictures picked out by the Frontback Staff.
Limitations
That’s seriously all this very new app can do at the moment. You are stuck with this generic top-bottom look with your photos and the app doesn’t feature any filters or editing features to help you enhance your snapshots, just yet.
You can fall back on Instagram (or other photo editors) to help enhance your photos. But we believe that if we give it some time to get its feed and other ‘following’ features to start, this app may find its way to a permanent spot on your iOS device.